Host a resource behind tunnel
Host a service through a noobtunnel tunnel without opening an inbound port on your router, including on a network behind CGNAT. This guide uses a small test website, a noobtunnel agent on the same machine, and a public HTTPS resource. Visitors use the public address; they do not need to install an agent.
For private access to your own devices instead, use the private WireGuard mesh. A public tunnel and a private mesh solve different problems.
Why port forwarding does not work behind CGNAT
Carrier-grade NAT lets your ISP share a public IPv4 address between customers. A port-forwarding rule on your router cannot configure that upstream NAT. A router WAN address in 100.64.0.0/10, or a WAN address different from the public IPv4 address seen by websites, can indicate CGNAT or another layer of NAT. Ask your ISP if you need confirmation.
noobtunnel uses an outbound agent connection and a public exit to reach your backend. Your home network still needs to allow the required outbound connections. The tunnel does not give your home router a dedicated public IP or change your ISP's NAT.
What you need
- A noobtunnel account.
- A computer running Linux or Windows, or a machine capable of running Docker.
Optional
- Python 3 for the test website below. If you already have an HTTP application, use it instead and skip to agent setup.
- Domain to publish your services on
1. Check your application or start a test website
If you already have a service, identify its listening address, port and protocol. Request it locally, then check that the same address and port are reachable from the agent's machine or container. Use those values instead of the demo below. Protect the application's admin and debug routes before publishing it.
On Linux, create a directory containing only the test page and start Python's HTTP server. Use a native agent on this same machine for the example.
mkdir -p noobtunnel-demo
cd noobtunnel-demo
printf '%s\n' '<h1>Hello from my home server</h1>' > index.html
python3 -m http.server 8080 --bind 127.0.0.1
Leave that terminal open. In a second terminal, run:
curl --fail http://127.0.0.1:8080/You should see <h1>Hello from my home server</h1>. On Windows with Python installed, create a folder with an index.html containing that heading, then run this command from that folder in CMD:
py -m http.server 8080 --bind 127.0.0.1Open http://127.0.0.1:8080/ in your browser to check it.
The server listens only on this machine's loopback address. noobtunnel can carry loopback services through the selected agent. The Docker installer uses host networking; on Linux this shares the host's network and loopback address. If you use an isolated Docker network instead, 127.0.0.1 refers to the agent container. See the Docker and backend reachability checks for that setup. Python's server is a temporary demo, not a production web server.
2. Install the agent on the backend machine
Create a free account and confirm the verification email, then sign in to the dashboard. Open Agents and choose Add agent. Enter a name such as home-server. Select Linux for a systemd service, Windows for a CMD installer, or Docker for a container, then choose Create install command.
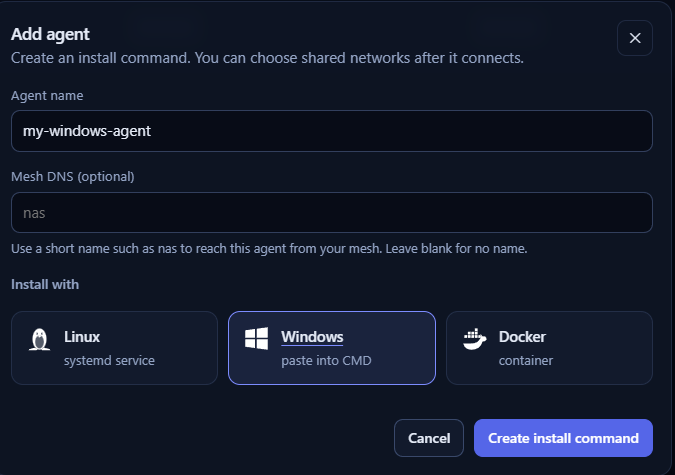
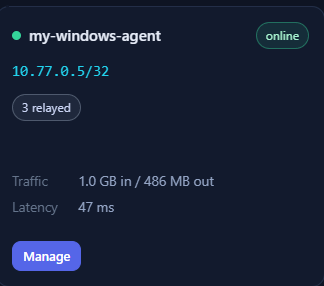
Copy the generated command and run it on the machine hosting the website. Use a terminal with sudo access on Linux or an administrator CMD window on Windows. Use the command for your own agent: it includes enrollment details and should not be shared. Return to Agents and wait for that device to appear online.
The agent connects outward; enrollment does not require an inbound router rule. If installation fails, check the generated command's server address, certificate fingerprint and the machine's outbound connectivity.
3. Publish an HTTPS resource
Open Resources and start a new resource. The wizard separates Service, Targets, Publishing, Limits and Security. Publish only the service you want visitors to reach.
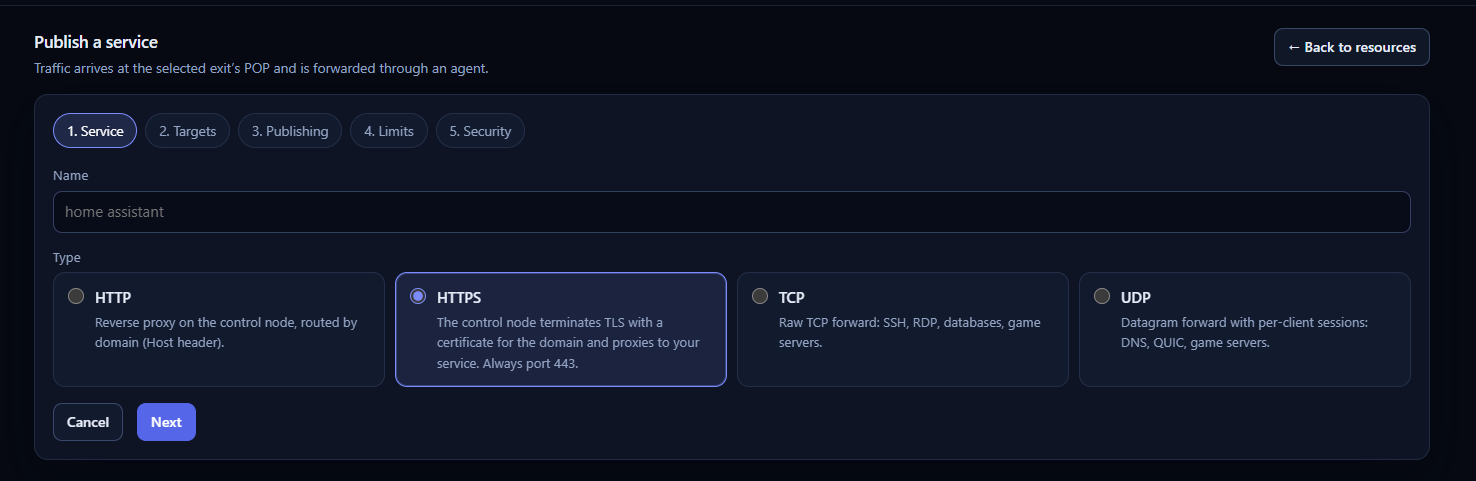
Service: choose a name and protocol
Name the resource and select your desired protocol. In this demo, we are using HTTPS. This is the visitor-facing protocol; the demo backend serves plain HTTP. For an existing application, choose the transport it needs. HTTP and HTTPS use hostnames; TCP and UDP use the assigned public port.
Targets: connect the resource to your application
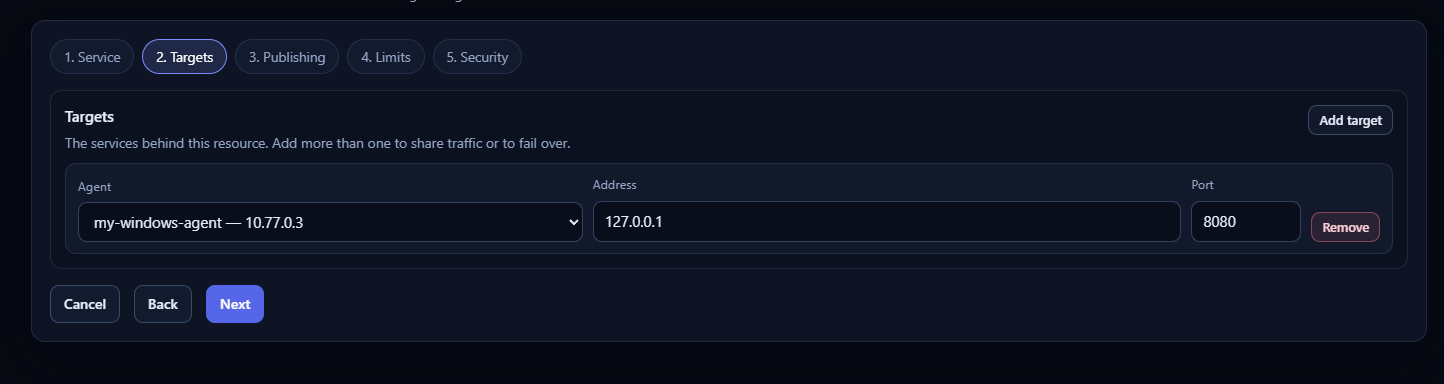
Select the agent you installed, set Address to 127.0.0.1 and Port to 8080 for the test website. For your own service, enter the address and port you verified from the agent's network environment. Start with one target so you can check the complete path before adding more.
Publishing: choose the exit and domain
Select an available Exit node and Domain. For a shared wildcard domain, choose an unused Subdomain. Check Will be published at and use that exact hostname when testing. The screenshot uses an example domain; select one available in your own dashboard.
If you bring your own domain, complete the verification or delegation instructions shown in Domains. Its DNS must route visitors to the selected publishing exit. The control panel location and the publishing exit can differ, so do not copy the panel's IP as a substitute for the resource's exit address.
Leave PROXY protocol off for this Python demo. Enable it only for a backend configured to understand it. Keep Published enabled when you are ready for the resource to accept connections.
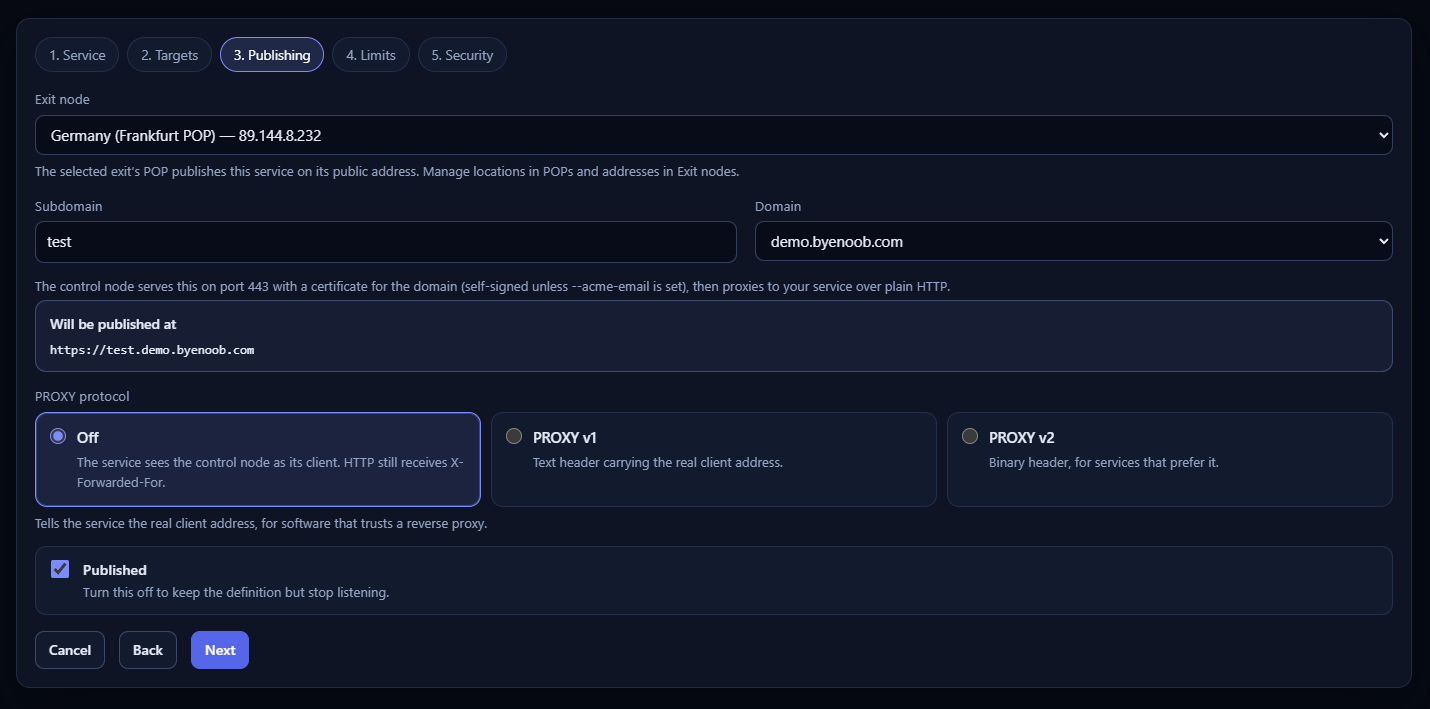
The public exit accepts the visitor's HTTPS connection and forwards it through the tunnel to your local HTTP server. Certificate issuance requires a correctly configured hostname. The tunnel protects its network segment; your application still needs its own appropriate access controls.
Limits: review the resource settings
Review the limits shown by the wizard, then continue to Security.
Security: decide who can access the service
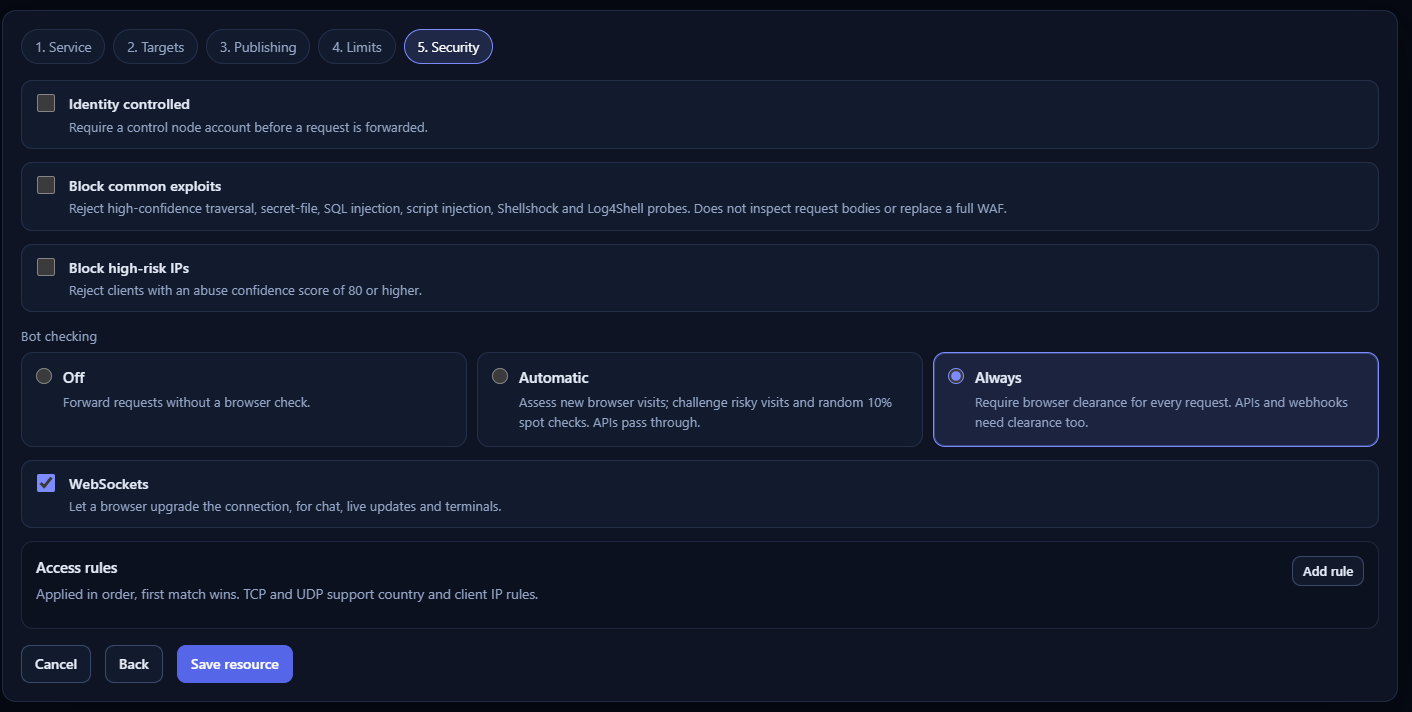
For the public test page, leave Identity controlled off so visitors can view it without signing in. For a private application, enable the appropriate identity controls or use the application's own authentication. Publishing a tunnel does not make admin pages private.
For the Python demo and command-line curl checks, choose Off for Bot checking. Always requires browser clearance and can block command-line clients, APIs and webhooks. Choose a setting that fits the clients your real application needs.
Block common exploits and Block high-risk IPs add request filtering; they do not replace application authentication or updates. Enable WebSockets if your application needs them. Review any Access rules in order: the first matching rule wins. Choose these settings for your service, then click Save resource.
4. Test from outside your home network
Open the resource's exact HTTPS URL on a phone using mobile data, with Wi-Fi turned off. You should see “Hello from my home server” and a valid certificate for the hostname. You can also test from a different internet connection:
curl --fail --show-error https://YOUR-PUBLISHED-HOSTNAME/Replace YOUR-PUBLISHED-HOSTNAME with the hostname saved in your resource. Do not use curl's insecure option to hide a certificate error. Check the resource's request log and the local Python terminal for the request.
If it does not work
- The local URL fails: start the backend and check its port before changing the tunnel.
- The agent is offline: check its service and outbound connectivity. The dashboard itself being reachable does not prove the agent is connected.
- Agent can't reach the resource: an online agent still needs access to the backend's address and port. Docker network isolation can prevent this. Follow the Docker and backend reachability checks.
- You get a gateway error: confirm the selected agent, target address, port and backend protocol, then check the agent and application logs.
- The hostname fails or HTTPS shows a certificate error: check the domain verification, DNS records, selected publishing exit and certificate status. DNS caches can delay changes.
- Access is blocked: check the resource's authentication and security rules, and its plan allowances.
The connection troubleshooting guide explains how to test each stage.
Replace the demo with your application
After the test works, stop the Python server with Ctrl+C and disable or remove the demo resource. Configure your real application as a new backend and verify it locally before publishing. A tunnel makes a selected service reachable; it does not make that application's admin pages private. Use application authentication or noobtunnel access controls for anything that should not be public.
HTTP and HTTPS resources use hostnames. TCP and UDP resources use the public address and assigned port shown in the resource; the HTTP demo above does not configure those protocols. For access that should stay between your own enrolled devices, choose private mesh access instead of public publishing.